Basic River Animations with Blender - Mosel Edition
Contents
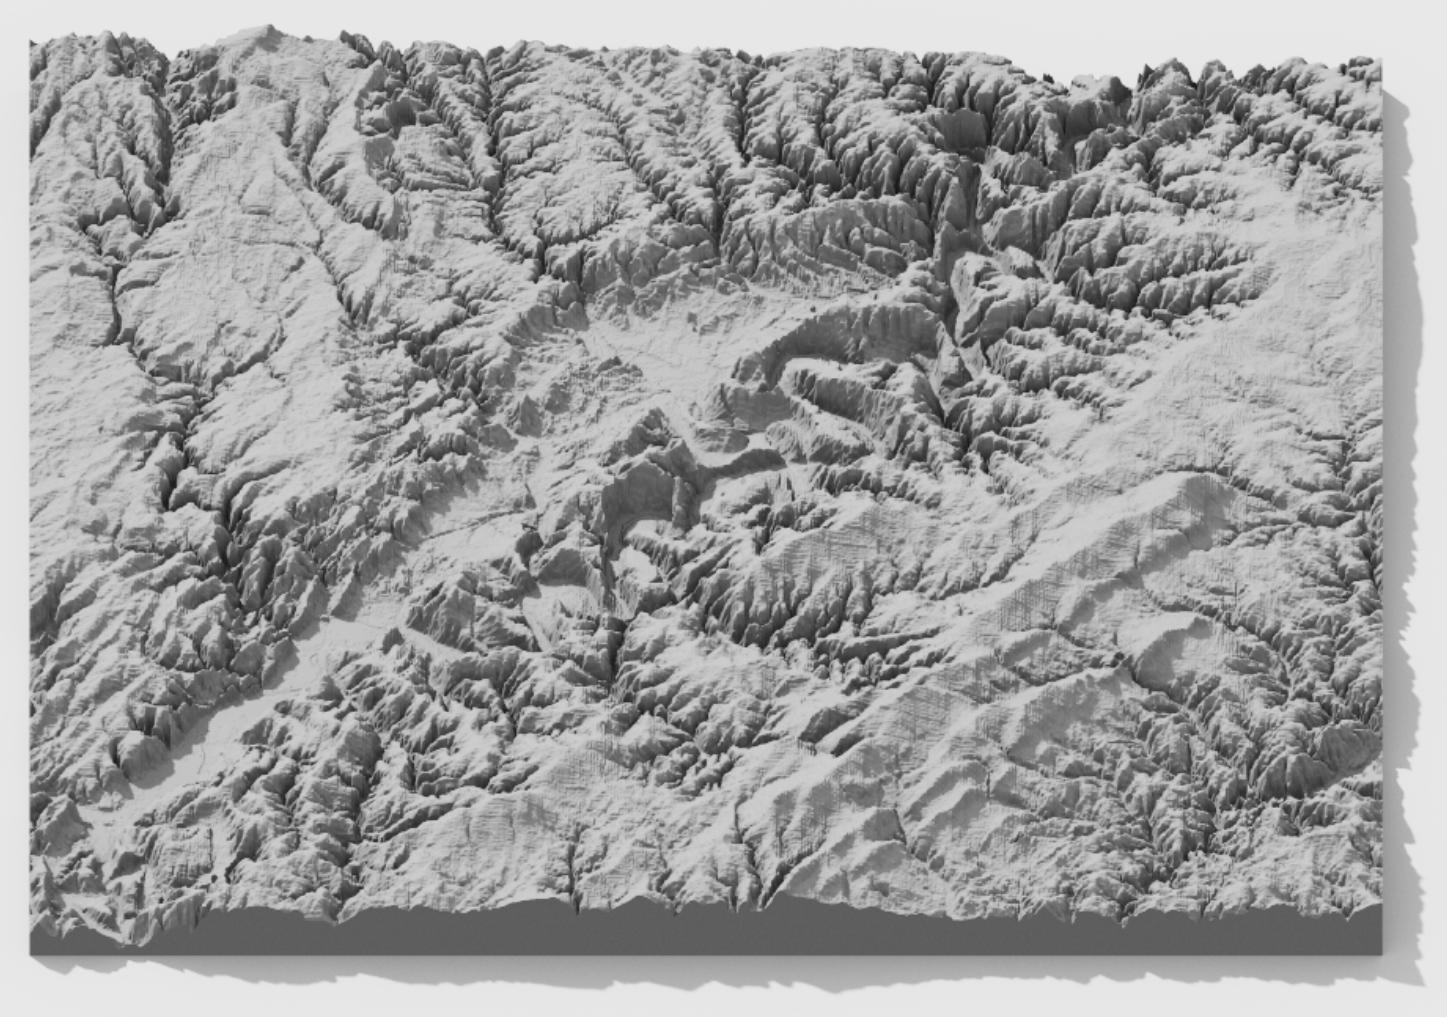
Basic River Animations with QGIS, Aerialod and Blender - Mosel from Trier to Traben-Trarbach
Foreword: 2021 Flood
In 2021, some parts of central Europe suffered a once-in-a-century flood arriving in one night only. Trier-Ehrang (Rheinland-Pfalz, Germany) for example, was devastated. People died and lost their homes. The hospital won’t be reopened and many people still fight with stress and trauma, the toxic substances or the economic consequences. Consider donating to a trustworthy organization listed here.
Idea
As Blender is gaining popularity in GIS, I wanted to create the most basic river/flood animation possible, not focusing on splendid colors, shadows and texture but rather a basic blue/brown representation that could be improved and used for other purposes as well.
Starting from an empty river bed, I wanted to visualize, where the water flows and which areas are flood prone.
Disclaimer
The method used here doesn’t respect the physical flowing behavior of water, meaning that a river is usually slightly inclined towards the delta. Hence, it is to understand only as an approximation.
Consider following some intro tutorial to Blender first, like the classical donut tutorial for Blender 3.0 (as of 01/2022). It will help understanding the below logic.
Workflow
1. Load DEM data in QGIS
Download some digital elevation model (DEM), e.g. from earthexplorer and drag’n’drop it in QGIS. Clip to your AOI if needed and export as .tiff.
2. Load DEM in Aerialod
Drag’n’drop the .tiff in Aerialod (if it doesn’t work, click on the image in the upper right corner and open manually). Tweak the settings e.g. offset, scale or lod (for LEGO effect).

Export the model as .ply under Export.
3. Load the model in Blender
File > Import > Stanford (.ply)
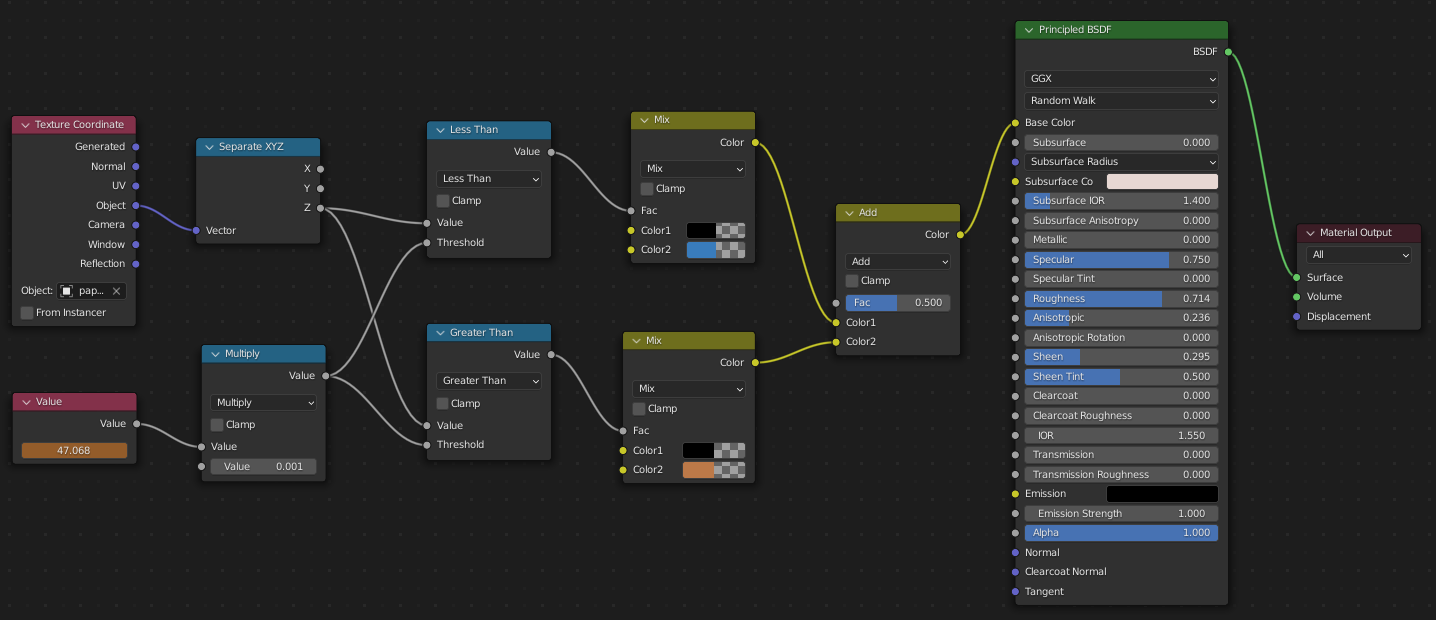
Go to Shading and enter the following nodes (Shortcut Shift+a for new nodes).

The left value is the slider for water (blue) / rock (brown) threshold.
4. Creating the frames
Go to animation, set the the number of frames (150 in my case) as End (lower right corner).
Now, for this animation I used 3 keyframes only*:
- No water
- Flood
- No water
In order to set those, click the first keyframe at frame 1 and go back to Shading. Set the right value for no water (e.g. 0) and whilst hovering over it click i for insert keyframe. This particular keyframe with no water in the river bed is now the first frame to be rendered and used as starting frame in the animation.
Go back to animation set the last keyframe (e.g. 75) and switch to Shading. Set the value to the highest threshold you would like to animate. E.g. either stop at the ’normal’ river level or go way beyond and create a hypothetical flood map.
Click i again and repeat the process for the last keyframe (e.g. 150, no water).
Tweak your light and camera settings.
*one could use only 2 keyframes and later add a boomerang effect
5. Rendering
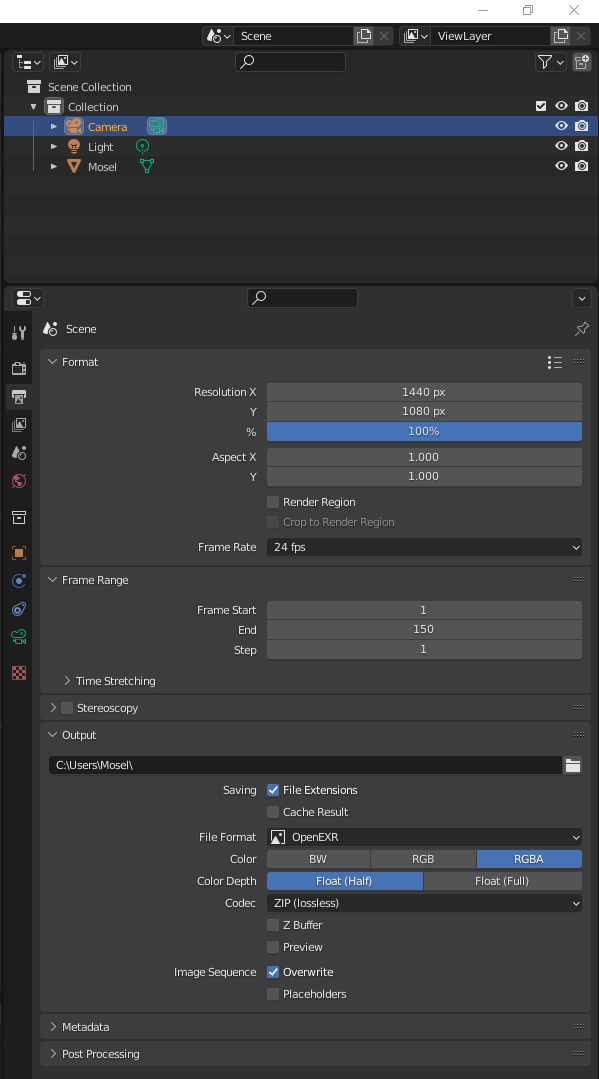
Tweak the render settings. For a quick version, stick to the standard settings or just copy mine and hit Ctrl+F12 for rendering all 150 frames.

6. Animating
When fully rendered, open a new Blender project and choose Video Editing. Load all the keyframes by clicking Add > Image/Sequence and choose your export folder from before. Set your export path.
Hit Ctrl+F12 again for the final video et voilà!
Résumé
This was a quick run for beginners. At any point consider diving into the vast world of Blender tutorials and tweak with the settings. Once you get the hang of it, it becomes truly addictive. Let me know if this tutorial helped you!
Consider donating to flood victims.