Guide to 3D OSM Building Models - Milan Edition
Contents

OSM data offers a vast amount of information about our cities. In this guide I focus on working and styling OSM building data for 3D-modeling in Aerialod for close-to-reality models.
Tl;dr: Use OSM building levels, emulate roofs with shapeburst effect and use Sketchfab for interactive 3D models
Recap
In my previous tutorial I explained how you can easily and quickly generate 3D models based on OSM buildings, roads and landuse with QGIS and Aerialod.
As this tutorial is a follow-up read through the previous one first and even try your own model. If you worked with QGIS before it will probably take you no more than 30 minutes.

Buildings
For the purpose of this tutorial, let’s reduce the complexity to buildings only. The following is nothing but OSM buildings on a black background (simply use a colored bbox for this) made with QGIS.

If you simply drag’n’drop this image into Aerialod, you’ll get nice 3D model out-of-the-box.

You probably notice two things here:
- Every building has the same height so skyscrapers are not recognizable.
- Roofs are flat. A slight shapeburst effect probably makes it look more vivid but it’s a matter of taste and purpose.
Let’s tackle those!
Workflow
Starting with a blank QGIS project, do the following:
- Download
buildingdata for your area of interest with QuickOSM. - Style the
buildinglayer by double clicking it and set the fill color to white - Delete unnecessary layers
- Add a black bounding box and drag it below
buildinglayer
At this point you generated the simple image from above you can drag’n’drop in Aerialod.
In order to use the levels perform the additional following steps.
- Luckily, QGIS can automatically convert
stringtointon the fly so we do not need to edit the attribute table and simply need to use theGraduated renderer. Double click on the layer and choose the following settings. Note that you probably cannot select the columnbuilding:levelsfrom the drop-down menu but instead need to type it manually. Choose theGreyscolor range and invert it. Use thesame intervalsetting and set the number of classes in a way that every class equals one level.

At this point you could already export the image and use Aerialod and see the different building heights! That was easy right?

It works! However, do you notice that some buildings are missing?
No? Me neither (😄) as Milan’s buildings are generally quite tall so the difference isn’t really noticeable.
But maybe in your case - when mapping for villages and lots of 1-level buildings for example - some will eventually be missing! Understand why?
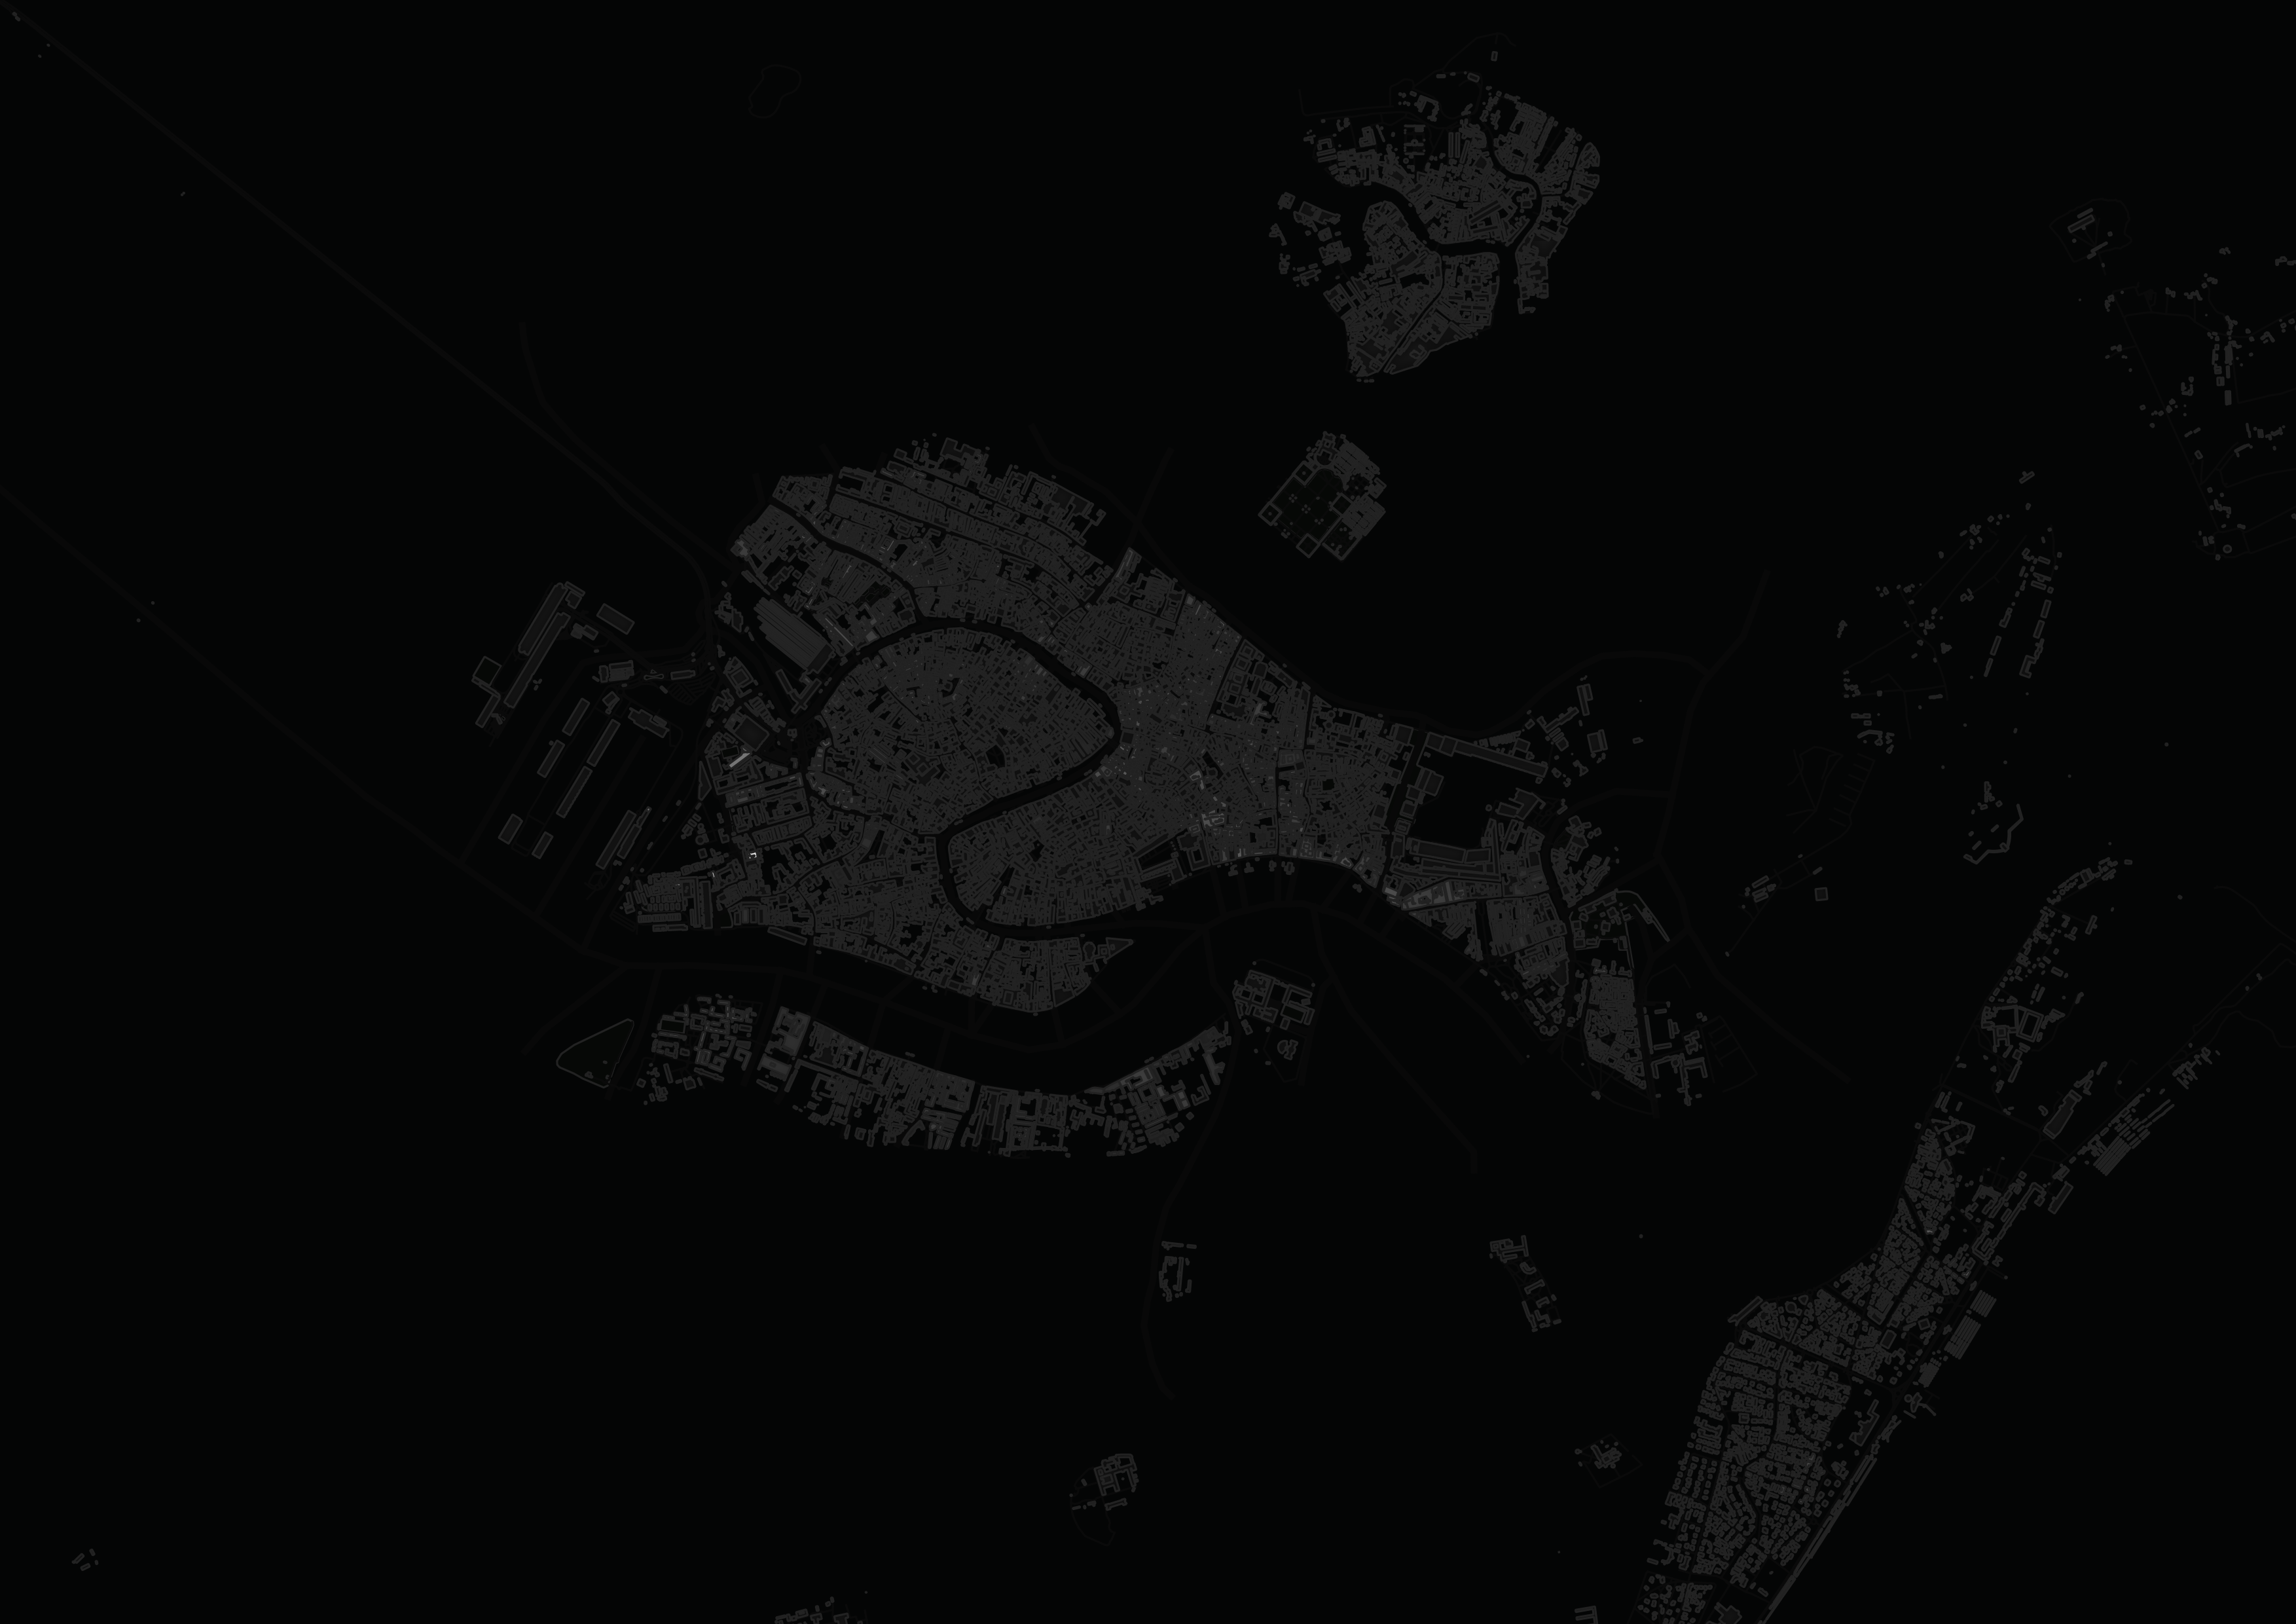
Yep! Our background layer is 100% black as well as our lowest class of 1-2 levels! If you want to create a model filtering out these buildings this would be totally fine but you very likely don’t want to. So instead, do the following.
- Go back to your
buildinglayer and edit the style of thegraduated renderer. Instead of using 100% black, use a very dark-ish gray. This helps Aerialod distinguishing between the background (bounding box, 100% black) and the different building heights (starting e.g. from 95% black to 0% black).
In this way, you can also combine different layers like roads and e.g. urban green spaces. Only keep in mind, that your lowest building class (0-1 levels) should be lighter than any other background layer! An example:
- background layer 100% black
- urban green spaces 98% black
- roads 96% black
- buildings 94% black - 0% black
If you want to know, how to combine these layers in the best way, take a look at previous tutorial.
The cherry on the cake: shapeburst
In my opinion a light shapeburst effect looks better than flat roofs but that’s certainly a matter of taste and purpose of your model. Achieving the effect in combination with building height can be a little tricky however, as one must adjust the grayscale very carefully.
The idea is to use two styles for the building layer. One for height and an additional shapeburst layer forming the roof. There are four ways to deal with roofs (orange) on buildings (blue, gray is ’lost’):

(1) No roof / last floor as flat roof.
(2) Added roof to normal building height. For this method the building edges have +0 % white while the center has +5% white, simply rising the white value (and hence roof height) to the center of the polygon.
(3) Substracted roof. In this way, the roof peak will be equal to the buildings highest point. Instead of adding white to the center we add black to the edges.
(4) Something in the middle. We create something in between and add a little white to the center and a little black to the edges. This is what we will do in the following.
Sounds abstract? Just dive right in.
First, go back to the building style and once more adjust the gray scale. This time we need to reduce the white percentage just add we did with the black percentage and drop it from 100% to e.g. 95% only in order to keep the remaining 5% for the roof. If one would leave the 100%, a roof could not be added to the tallest building as it would have already 100% white.
Add the shapeburst by clicking on
Symboland adding afill. ChooseShapeburstand edit everything accordingly. This equals roof variant (4) from before.

Note that QGIS erases building:levels every single time you edit the style.
If you did everything right, you should be able to see the effect in QGIS already.

In case you’re not hawk-eyed, simply take a screenshot of the whole QGIS canvas and put it in Aerialod. There you will quickly see the result!

Notice the ’layers’ on top of each building? This is what the 5% causes. Raise it if you want more, lower it if you want less.
Now you got everything you need! Go ahead and add roads and parks as I explained before and you will be able to get a really cool close-to-reality 3D building model in no time!
Tre Torri in Milan’s City Life district

Download a (slightly edited) high resolution version here.
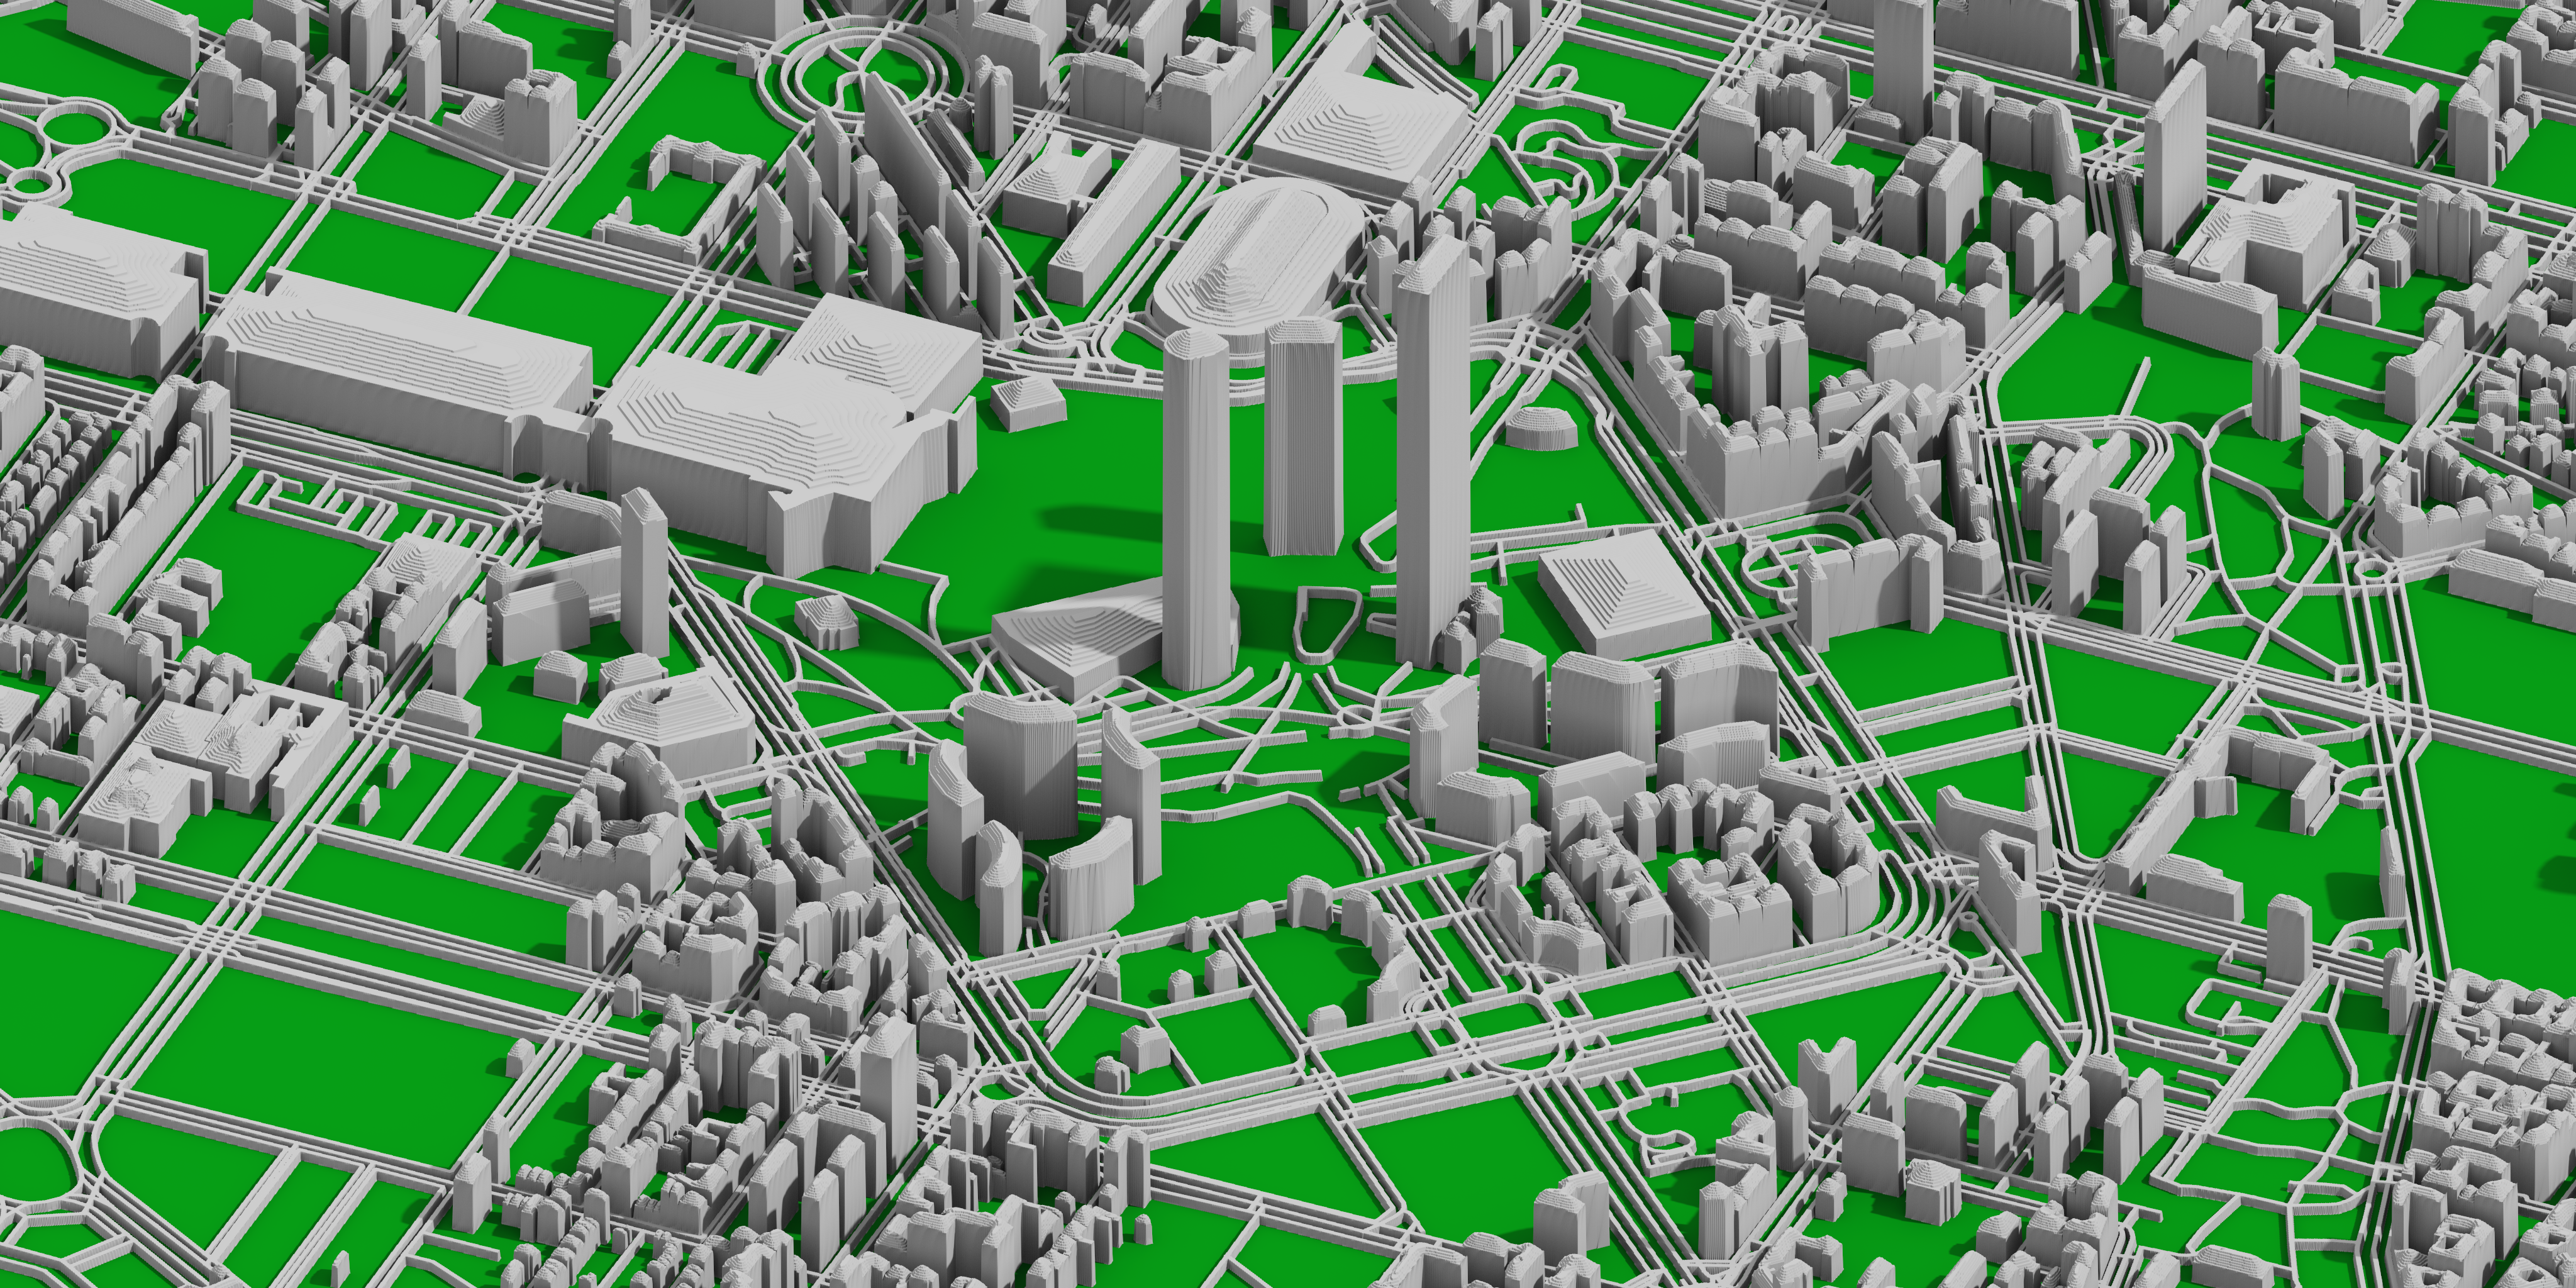
Piazza Gae Aulenti and Parco Biblioteca degli Alberi in Milan Garibaldi


Update: Venice city model

High resolution version here.
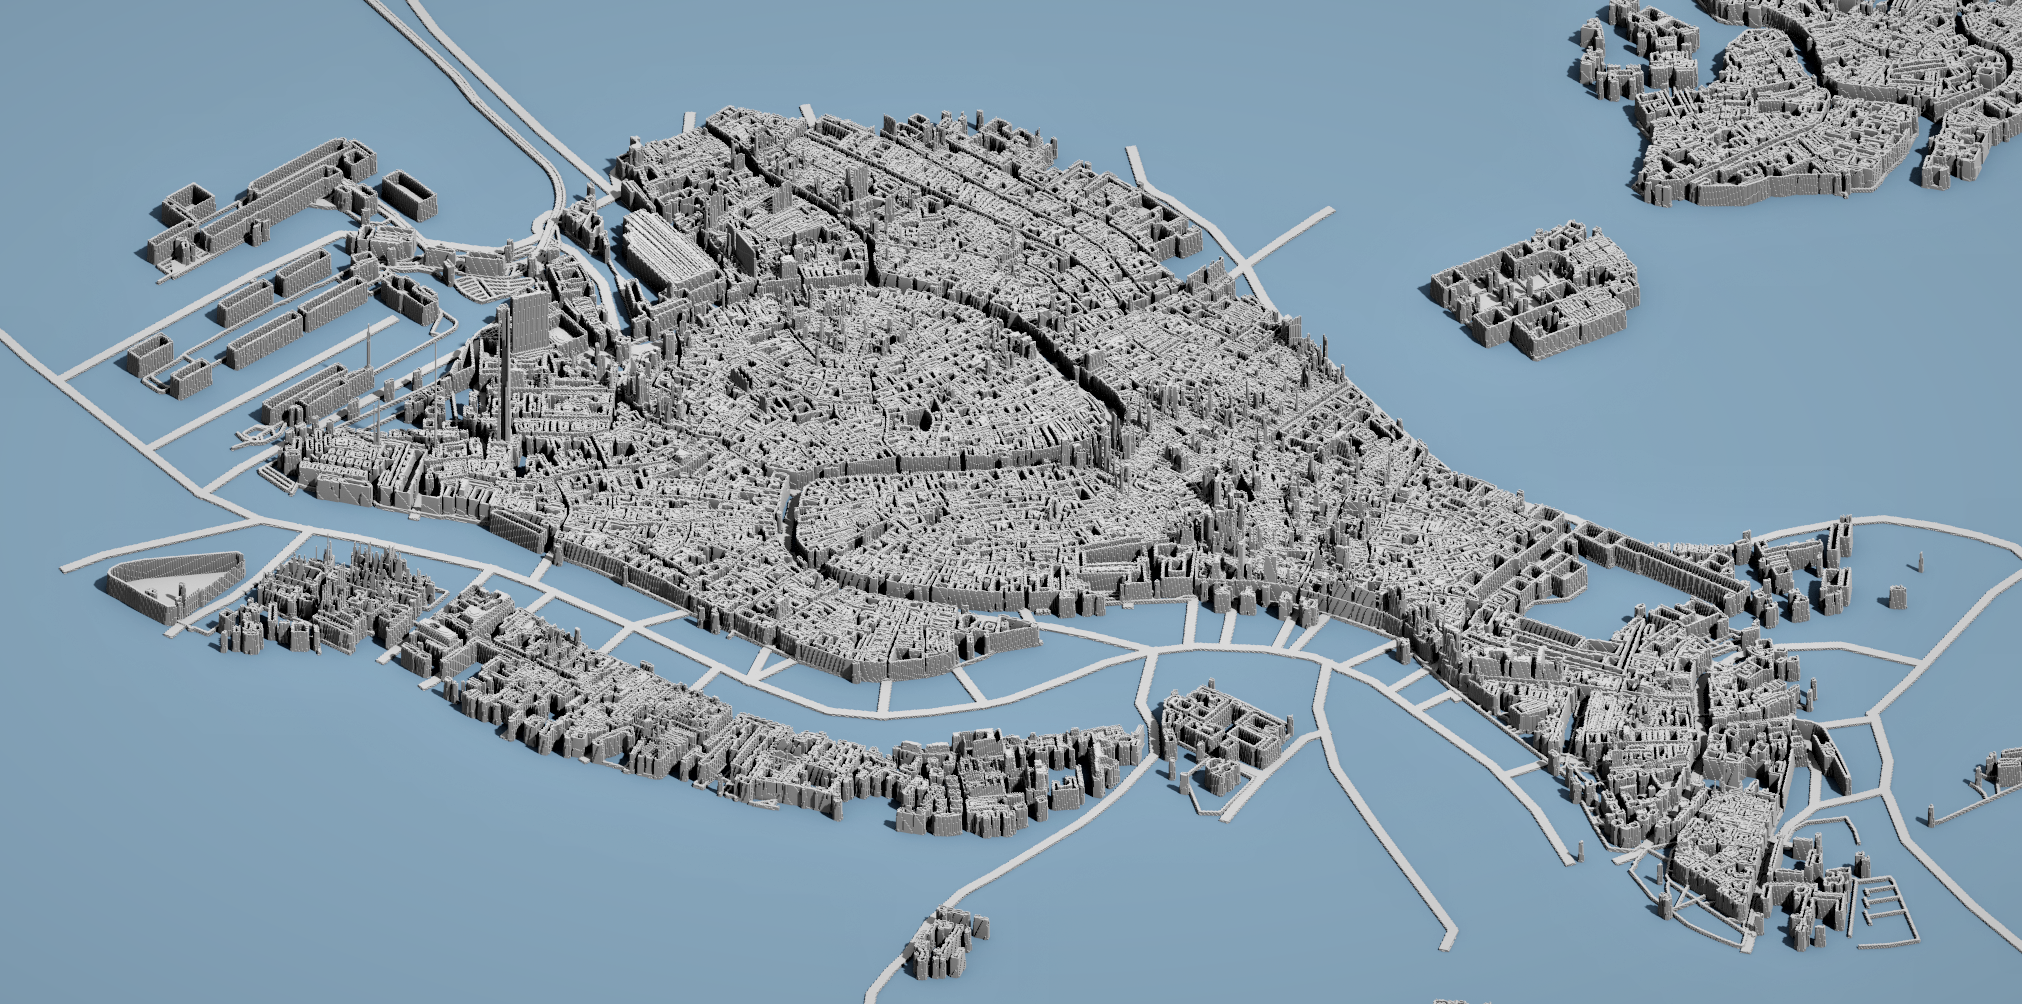
Would you like to get started quick?
Feel free to download the raw image you can simply drag’n’drop in Aerialod!
BONUS: Interactive 3D models with Sketchfab
Sketchfab is an open platform for 3D models. You can view, edit, upload and download 3D models and embed their amazing 3D viewer on your homepage!
Simply export your 3D model as .ply file in Aerialod and upload it. Get your embed code and there you go!
Only keep in mind that they limit free models to 50mb so you won’t be able to upload an entire city with the free plan. Milan’s Tre Torri skyscraper are no problem at all and occupied ~20mb in my case.
VR
You can even view the model in VR using Sketchfab! 🕶️
